Programming the iCE40HX1K-EVB FPGA with a Bus Pirate
Now that it is possible to use some FPGAs with a fully Free Software toolchain, I've started to play with them (as apparently everybody is doing these days), currently just with the aim to learn something new (yay for solutions in search of a problem!).
Since we were already buying stuff from Olimex, my SO and I decided to buy an iCE40HX1K-EVB, and then proceeded as usual to leave it on a shelf while working on a thousand other projects, but in the last couple of weeks I finally started to try and let the usual LED blink.
In order to learn some verilog I'm using the tutorial by Obijuan of FPGA-Wars fame. Of course, that is designed for the ICEStick, which can be flashed via usb (like the Icezum Alhambra), so I had to follow the instructions on the Olimex wiki to find how to flash my board via SPI.
According to tradition, I choose to do so on the very day when my SO was using our OLIMEXINO-32U4 to do reflashing tests for the TERES I keyboard controller, so I couldn't use it as recommended. We do however have a Bus Pirate which provides slow SPI and can be used with flashrom, and there were instructions on how to use flashrom on the raspberry, so I only had to find out which pins went where, and started to write this page to remind me of the result.
This is easy enough that after an afternoon of attempts nothing worked and I moved on to just following the first pages of the tutorial using the simulation, postponing the use of actual hardware. A couple of evenings later, my SO grabbed the oscilloscope to help me debug the issue, I carefully reconnected everything while passing through a minibreadboard in order to have room for the scope probes and decided to run flashrom another time, just to go back to the non-working known state.
This time, it worked out of the box, surely thanks to the Menace of the Probes (and not because of me having failed to connect something with dupont cables the first time), so I could continue exploring this FPGA, and this article contains my resulting board-specific (or mostly board-specific) notes.
HOWTO
It is possible to (slowly) program the iCE40HX1K-EVB FPGA board using a Bus Pirate and flashrom.
Requirements
Under Debian testing (buster) I didn't need to get anything from upstream, as the versions already packaged in Debian worked fine.
I installed flashrom:
apt install flashrom
and the icestorm etc tools:
apt install fpga-icestorm arachne-pnr yosys yosys-doc iverilog gtkwave
See the Olimex wiki for installation / compilation details if your distribution does not provide them.
Wiring
This is the required wiring:
| BP | ICE40HX1K | ||
|---|---|---|---|
| gnd | 1 | 2 | gnd |
| gnd | 1 | 6 | creset |
| clk | 7 | 9 | sck |
| mosi | 8 | 8 | sdo |
| cs | 9 | 10 | ss_b |
| miso | 10 | 7 | sdi |
note that:
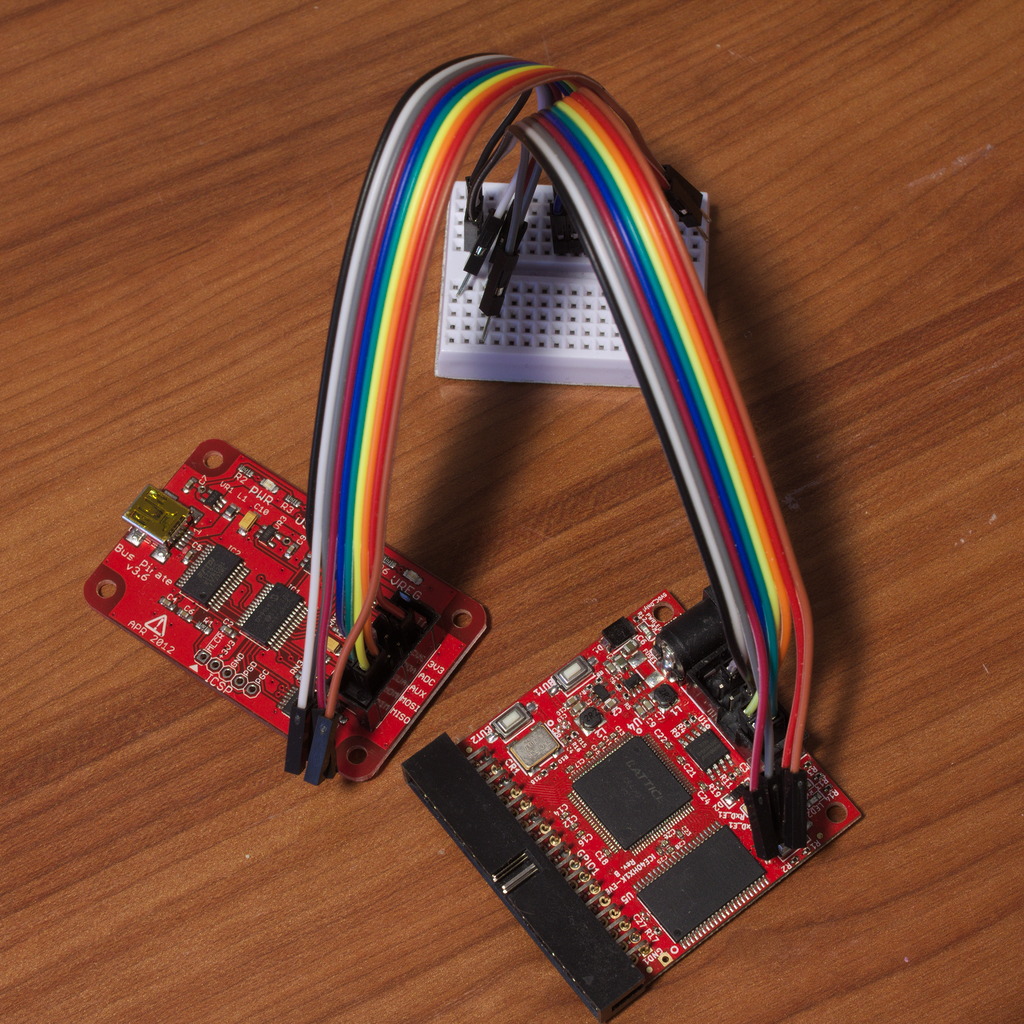
- gnd from the Bus Pirate should go to both gnd on the ICE40 and creset; you could keep the reset button pressed instead, but you would have to do that for minutes, which is extremely not recommended; this is the reason for the minibreadboard in the picture;
- I didn't close 3.3V_E1, so the ICE40 needed to be powered from the barrel plug during flashing (I used power from USB on the same laptop where I had connected the BusPirate).
Flashing
To read the current contents of the flash chip:
/usr/sbin/flashrom -p buspirate_spi:dev=/dev/ttyUSB0,spispeed=1M -r dump
To write back the same data [1]:
/usr/sbin/flashrom -p buspirate_spi:dev=/dev/ttyUSB0,spispeed=1M -w dump
| [1] | this is actually futile, as flashrom will read the flash before writing and only write the differences, i.e. at the moment nothing. But it can be useful as a test, or to write back the original content for any reason. |
As a more significant test, you may want to get the blinking led demo:
git clone https://github.com/OLIMEX/iCE40HX1K-EVB.git
cd iCE40HX1K-EVB/demo/ice40hx1k-evb
compile it using the included Makefile:
make
you now need to pad the resulting image, as required by flashrom:
dd if=/dev/zero bs=2M count=1 | tr '\0' '\377' > example.img
dd if=example.bin conv=notrunc of=example.img
and flash it:
/usr/sbin/flashrom -p buspirate_spi:dev=/dev/ttyUSB0,spispeed=1M -w example.img
this is an example of expected output:
flashrom v0.9.9-r1954 on Linux 4.14.0-3-amd64 (x86_64)
flashrom is free software, get the source code at https://flashrom.org

Calibrating delay loop... OK.
Found Winbond flash chip "W25Q16.V" (2048 kB, SPI) on buspirate_spi.
Reading old flash chip contents... done.
Erasing and writing flash chip... Erase/write done.
Verifying flash... VERIFIED.
did I mention slow? time-ing the above command gave:
real    11m41.930s
user    0m2.459s
sys     0m0.758s
(there is margin for improvement with a recent version of the BP firmware, but I still didn't find time to look into it).
Synthesis and simulation
Using the examples above, I've assembled a Makefile for my projects with the following targets:
- sim:
- runs the simulation defined in the testbench.
- showsim:
- shows the simulation results with gtkwave (this is a separate target as it requires a GUI).
- sint:
- synthetizes the circuit, generating a .bin file.
- flash:
- uses flashrom to load the circuit on the fpga.
It expects a verilog file my_project_name_here.v, a verilog testbench in my_project_name_here_tb.v that dumps data with the line $dumpfile("my_project_name_here_tb.vcd"); and a physical constraint file ice40hx1k-evb.pcf.
