Parallelepipedal Handbag
Contents
I needed a small bag. It was supposed to fit inside my daily backpack, but also be easy to grab and bring whenever backpacks are forbidden (such as inside more and more banks — and shopping centers) to keep the bare minimum things that I need in those context.
I also wanted to experiment with using zip-ties as boning to provide support and shaping to bags; this part has been quite a success, and I plan to continue to use them in further projects.
While I've made the first mock up in January 2017 and used it since then, the project is still in progress, and this page will be updated with more pictures from the next iterations, including step-by-step ones for the tutorial.
Pattern and Instructions
Downloads
- regular bag pattern as a big SVG file
- regular bag pattern printable on A4 paper (PDF)
- thin bag pattern as a big SVG file
- thin bag pattern printable on A4 paper (PDF)
The valentina source code is available in my git repository and can be customised to different sizes.
Materials
You will need to cut the following parts both in fabric and in lining (all measurements are given without sewing allowance; the printable pattern include the recommended allowance of 2 cm). Values in square brakets are for the thinner variant.
- 1 x front, bottom and back (one single rectangle, 13 x 46[42] cm)
- 2 x side panels (rectangles, 8[4] x 19 cm)
- 1 x top flap (made of a rectangle 21 x 16[12] plus a trapezoid with 21 cm base, 8 cm height and 45° angles)
You will also need the following notions:
- At least 50 cm of 25 mm webbing (or more, at your discretion)
- 4 d-rings, 30mm wide
- 2 press buttons or 5 cm of velcro
- 8-10 zip-ties, long enough to get 8 straight pieces 18.5 cm long and two straight pieces 13 cm long. I used 4.8 mm wide ones; wider ones will require wider sewing allowances.
Fabric suggestions
This bag uses zip ties to provide shape, so it can also be made in thin and/or soft fabrics, altought you want them to be sturdy enough to survive the wear and tear of a bag.
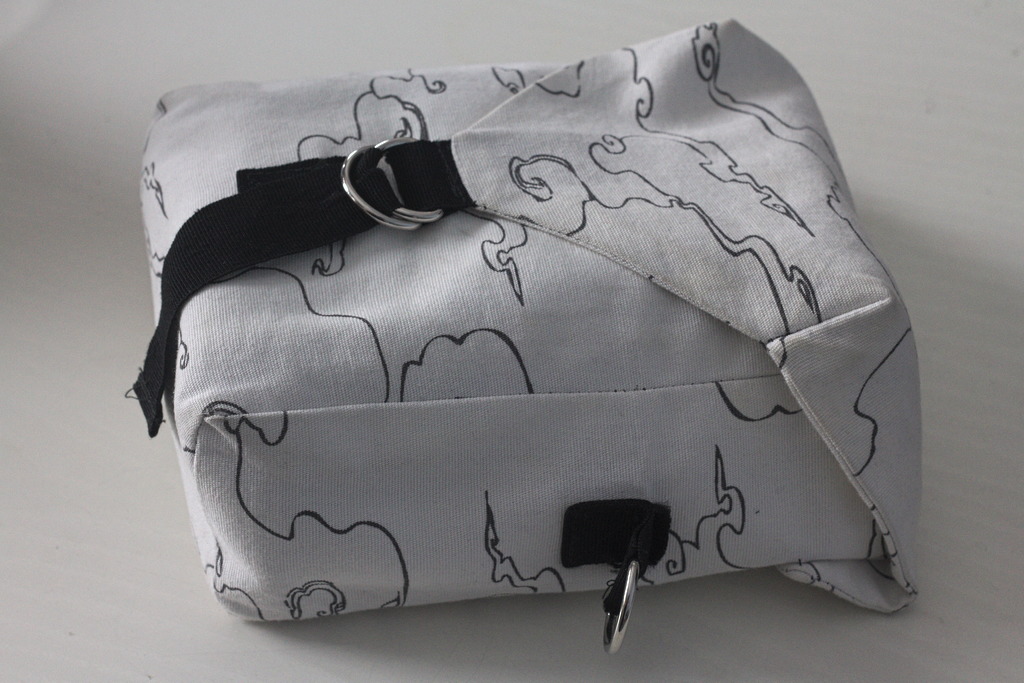
Cotton mockup (used for months, even if not water resistant).
My first mock-up was made in thick but soft cotton fabric from IKEA and ended up being quite usable, even if of course it's not water resistant. I have vague plans to maybe try waxing it, but they may end up in nothing. I've used the same fabric for both the outside and the lining.
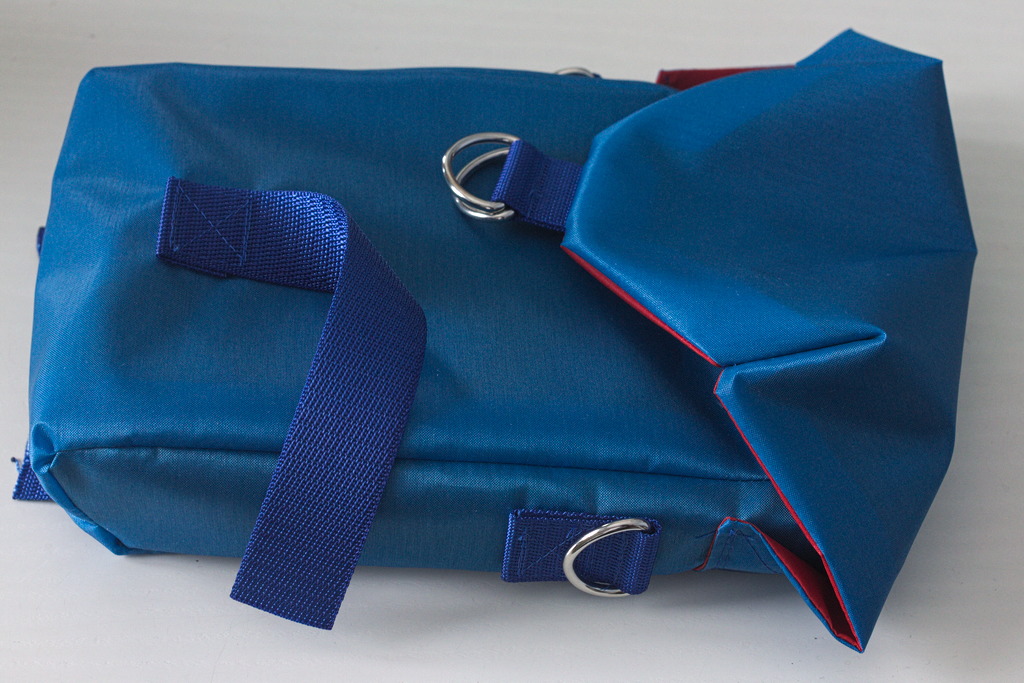
Silnylon, second attempt with bad corners.
The second bag was a thinner one in silnylon: the slipperyness made it a bit harder to make. Again, the same fabric was used for the outside and the lining (in different colours so that it shows better in the pictures — and because it was less transparent than two layers of the same colour).
I plan to make another using heavier coated cordura for the outside and thin ripstop nylon for the lining, when I'll get big enough leftovers from other projects. At that time I will also take step-by-step pictures for the tutorial.
In theory the bag could be made without a lining, but between the outer accessories and the zip-tie channels there is a lot of stitching that will then show on the outside and possibly be caught and ruined by items on the inside. You would also need to protect the raw edges in some way.
Instructions
lining
To assemble the bag, start by attaching any feature you want on the inside to the lining, such as applied pockets or bits of elastic.
Now assemble the lining: if the fabric requires it zig-zag all of the raw edges of the main rectangle and the two sides.
With their right sides facing, sew the sides to the main rectange, taking to form nice corners at the bottom.
Use the allowances to form two vertical channels by opening them and sewing about 2 mm from the corner seam and then again 8 mm from the first line; insert the long zip tie pieces in the channels.
Fold down the top edges, sew 1-2 mm from the fold (depending on how tick your fabrics are) then push the remaining zip tie pieces as close to this seam as possible and sew again a second line as close to the zip tie as possible (you may want to use a zipper foot for this step). To prevent these zip tie pieces from moving around, backtick a short line parallel to the side seam, about 1 mm from it.
Outer body
Attach any external feature to the fabric; the pattern has markings for some suggestions.
- Use 8 cm of webbing to attach two D-rings to the sides as attachment points for a shoulder strap.
- Attach 18 cm of webbing to the front for the closure.
- Attach two pieces of webbing about 17 cm long to the back by sewing them near the top and using press buttons or velcro to close the bottom; these can be used to attach the handbag to a belt.
Now assemble the outer body: if the fabric requires it zig-zag all of the raw edges of the main rectangle and the two sides.
With their right sides facing, sew the sides to the main rectange, taking to form nice corners at the bottom; turn the bag inside out.
Top flap
Prepare a piece of webbing with two D-rings for the closure, sew as near the rings as you can.
Place the lining top on the fabric one, with their right sides facing and insert the webbing so that the D-rings are towards the inside; sew all around the borders leaving 6-8 cm of opening on the longest edge.
Clip corners and turn inside out.
Sew the two front corners as in the picture.
Assembly
Place the top flap on the main body so that it overlaps 4 cm from the top edge, with the lining side of the top on the fabric side of the body.
Sew a line that starts 2 mm from one upper corner of the main body, goes down to the corner of the top flap, follows the long side of the flap at 1-2mm from the edge and goes back up in a diagonal line until 2mm from another upper corner of the main body.
Now insert the lining in the bag so that the wrong sides are facing, and sew them together following the upper seam on the lining.
The bag is complete; add a shoulder strap (idea: make one with paracord), or attach it to your belt (or to webbing on a backpack) with the back loops.
Gallery
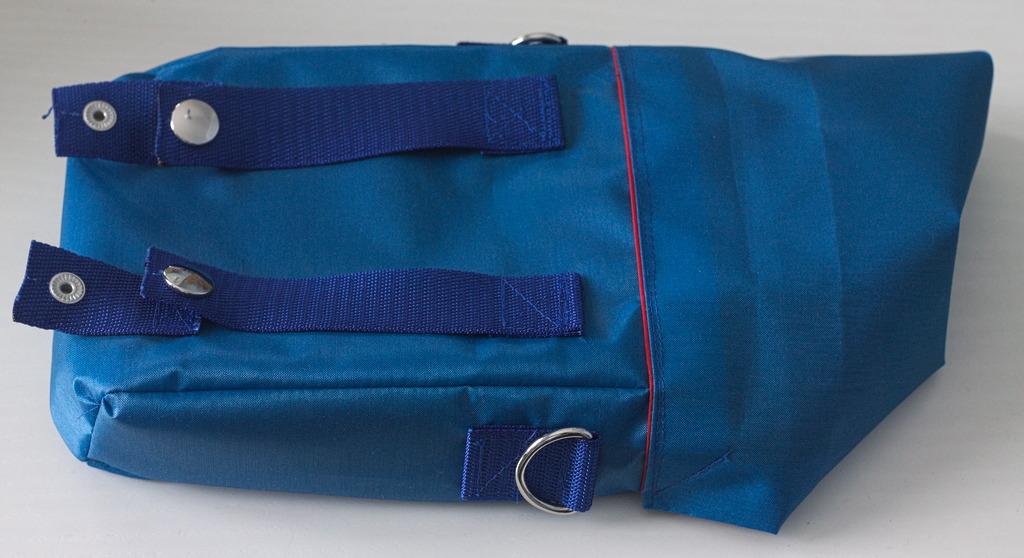
Back of the silnylon second attempt, with improved back straps.
